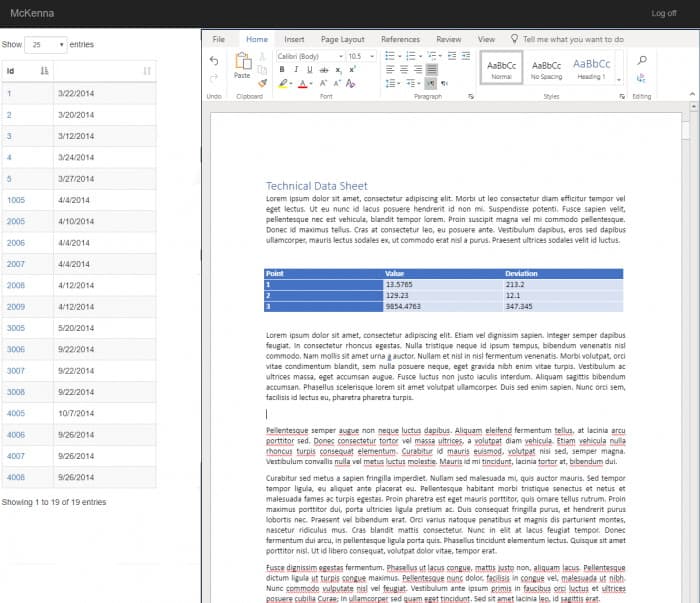
Using WOPI To Embed Microsoft Office in a Web App

Are you thinking about harnessing the capabilities of Office Online to enhance your web Application by embedding Word, Excel or PowerPoint?
This is the first in a series of blog posts relating to embedding Microsoft Office document editing capability using WOPI in bespoke web Applications.
In this post, we’ll give you some guidance on what WOPI is, how it’s used and how you can get started with it.
What Is WOPI?
WOPI, or Web Application Open Platform Interface, refers to a sequence of operations that allows users to gain access to a server and change files and data stored within it.
As a REST-based protocol, in order for the process to work HTTP requests need to be sent to a set of defined operations and REST endpoints. Therefore, in order to embed web-based Office document editing in your web Application, WOPI must be developed as a RESTful web API for implementation. You don’t need to implement the whole protocol; you only need to implement the methods of the protocol that are required for your web Application.
In the simplest scenario, you just need to implement a few methods to embed a read-only Word editor in your web Application. This is both easier and harder than it sounds.
- It’s easier because it’s just a simple API implementation.
- It’s harder because the documentation for that implementation is very poor and lacks a complete working example.
Common Uses of WOPI
One way that the WOPI technique is often used is allowing users to store and edit Microsoft Office documents with a web App.
For example, say you are developing a web App for software that tracks the development of engineering components. The components could have data sheets that are being collaboratively written using Word and technical calculations that are being developed using Excel.
Rather than having users leave your web Application to edit these documents and having your users manually upload and download them to and from your software, you could streamline the process by embedding Office Online Word and Excel edits inside your Application.

Getting Started With WOPI
To get going with this process, you will need your usual development environment (e.g. Visual Studio) and access to Office Online.
Access to Office Online is either typically through Office 365 (hosted by Microsoft) or by an on-premise install of Office Online Server. If you are going to use the Office 365 approach, then you will need to enrol in the Office 365 Cloud Storage Partner Program. If you are developing for Office Online Server, you don’t need to do this.
Using Office Online Server makes it much easier to set up a development environment and simple, testable product. The simplest way to get a copy of Office Online Server is to organise yourself an MSDN subscription.
If you’re reading this, then chances are that you are already interested in web App development and you already have an MSDN subscription. If you want to develop using Office 365 then you have to get some endpoints registered with Microsoft and jump through a few other hoops which can take a little while.

What’s Next?
The next thing you will need is access to the WOPI documentation.
The good news is that it is freely available. The bad news is that it is incomplete, inconsistent, vague and inaccurate.
In our next post, we will explain how you set up your host iframe to hold the Office 365 editor for your web Application, and we will explain some of the underlying concepts of WOPI that you need to get you started.
If you’re running into issues with WOPI and the implementation of Microsoft Office, please take a look at our blog posts on troubleshooting WOPI APIs and verifying API requests with proof keys.
To enlist the help of our experienced bespoke software developers with implementing WOPI and integrating Office 365, please contact us at McKenna Consultants for a free consultation.
