Integrating Auth0 With Azure Active Directory

Task 3: Configure API Permissions
To find more help on this task take a look at the official Microsoft documentation.
We need to configure access to the MS Graph API for retrieving basic user profile and directory info (some of which will find its way into Auth0 via the sync when the user logs in via Auth0). This will be done with delegated permissions which give access to the ‘User.Read’ and ‘Directory.Read.All’ permissions.
The key steps are:
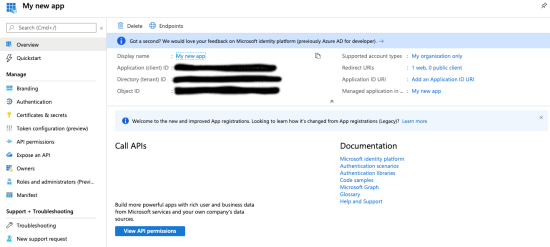
1. Start on your App registration overview screen.

2. Click the “View API Permissions” button.

3. You should now see the API permissions screen.

4. You should see that “Delegated” permission for User.Read is already configured by default. If not, follow the steps below replacing Directory.Read.All with User.Read.
5. Click “Add A Permission”.

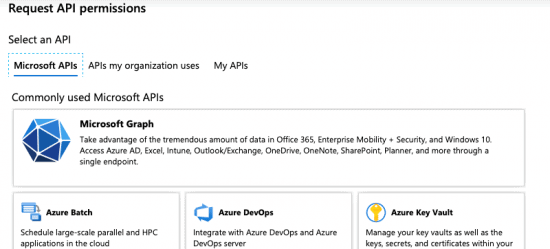
6. You should see the “Request API Permissions” dialog.

7. Select “Microsoft Graph”.
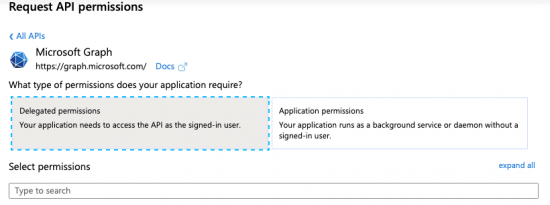
8. You should see the following:

9. Select “Delegated Permissions”.
10. This should reveal the “Select permissions” search field.

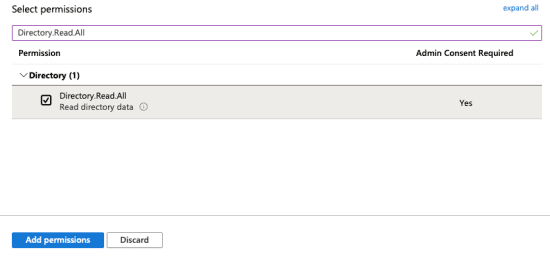
11. In the search text field under the “Select Permissions” heading enter the text ‘Directory.Read.All’. This should result in the following results:

12. Tick the checkbox next to the “Directory.Read.All” permission. This should result in the following:

13. Click the “Add Permissions” button.
14. OPTIONAL: If we want to avoid users having to manually accept giving our application access to these permissions we could click the “Grant admin consent for YOUR_AZURE_AD_DOMAIN” button.
To find out how to create and configure Auth0 application, click below to go through to page 4.
Posted in: Mobile Apps, Progressive Web Applications, Systems Integration Tags: auth0, auth0 integration, azure active directory
